This Land is My Land

This Land is My Land

PAINTINGS FOR SALE??????

HELL YES they are for sale!!! I believe in "Affordable art for the masses!"

Check out my ETSY STORE for original paintings

If you have any questions regarding my paintings you can contact me at rvpainter@gmail.com


Friday, March 29, 2013

THROUGH THE THICK OF IT ALL - DEMO

Yo my friends,

I have another demo for y'all this week.  This painting is 14 x 11 done on Heavy Linen paper using palette knife and brush.  It is painted wet into wet - alla prima - with gusto - emotion - efficiency of strokes and of course spontaneity of color.  You need to keep in mind that we are in Southwest Florida on the Gulf of Mexico and with the bright sun the effect of "LOCAL COLOR" is tremendous!!!!!

Some terms for the non-painter.

Wet into wet - the entire painting is done before any section of it can dry

Alla Prima - the entire painting is done in one sitting

Local Color - this is all the color from all the surrounding objects that reflect onto the object being painted.  This includes the sky - the ground - and any color within reasonable distance from the object. I tend to exaggerate this but hey - it's my painting and I can do that!!!!  :>)


I do a quick sketch of the scene - most of this will be covered up during the process of developing the background but I refer to the photo to get my thoughts back as to where things go


The approach I'm going to use with this painting is to paint in the background around the palm tree trunks and then develop the palm tree trunks.  For this I use a brush and just in a "willy-nilly" fashion I paint in (sort of a scrubbing motion) the beginning of the "forest" behind the trunks


I'm not really being careful or exact around the trunks as later I will generate the trunks with my palette knife so exactness is not an issue


Next I want to make the background lighter at the top as the further UP into a forest of jungle you go the lighter it becomes as the sky (light source) is of course at the top  :>) 
So I load up my brush with yellow to get the effect of light


I throw in the yellow in a quick non-defined manner - what this does is lighten the green 


With my palette knife I begin to develop the palm tree trunks - going outside the shape to get the desired shape I want & if necessary cover over some of the green background


With my palette I create the 2nd tree trunk and using a brush I develop some hints of "foliage" behind the palm trunks - in addition with my palette knife I create some of the ground the tree trunks are sitting in and on


OK - the next few photos speed things up a bit since it is time to get some "Local Color" into the painting and this is done with both brush and palette knife - at the same time the background is developed with more suggested detail and color 


Detail of palm fronds


Additional color is thrown onto the trunks


Some bright "sunshine" color onto the trunks 


BAM-BAM-BAM

WE HAVE A FINISHED PAINTING


Well I hope you enjoyed this demo as I certainly had a blast doing this painting.

I'll  be back in about a week with another blog post - in the meantime enjoy life - smile - laugh - you'll stay a lot younger!!! 

JR    :>)


Friday, March 22, 2013

TECHNICALLY COLOR

Yo my friends,

Melissa and I went to a local Art Festival this past weekend and there were some very good artists exhibiting - one artist in particular caught my eye.  As most of you know, I LOVE COLOR AND TEXTURE - to me it is what painting is all about.  The artist that caught my eye was from MIAMI and she came into this world without a FEAR OF COLOR!!!!

Sooooooo that said - and I just said it - the artist that caught my eye did very large - very very very colorful "MIAMI" type tropical pieces soooooooo I said to myself "Self - go home and try some of this style for yourself, adjusting it to fit into your own style."

"TECHNICALLY COLOR"

18 X 24 ON HEAVY LINEN PAPER- done with a big brush - (2 inches) - and my trusty buddy "MACK THE KNIFE!"  

I pulled out all the stops on this piece in that all and any caution was thrown to the wind and working wet into wet with every ounce of emotion - gusto - and spontaneity in color and knife strokes I let the paint fly and land where it landed!   :>)  VERY LIBERATING!!!


First I throw in my sketch - pencil lines to show "where" & "direction"  nothing fancy as you know, I always go outside the lines --- I'm a non-conformist - :>)


Next using a 2 inch brush I throw in a vertical sky as the painting is going to be vertical in orientation so why not a vertical sky!!


Next using my palette knife I put in the horizon line indicated by the darker vision of the ocean 


Again, with my trusty buddy "MACK THE KNIFE" I put in the ocean and of course make sure to include that Caribbean green that everyone loves


When I threw in the sky I painted around the palm tree trunk and of course I won't stay within the sketched lines anyways so accuracy was not an issue
At the same time I use the palette knife to put in a trunk and throw some cast shadow onto the sand


NOW - this next part requires that I work very quickly in order to get a good blending of color as I apply it wet into wet so I did not take any "progression photos" as time is of the essence!
Once again this is a painting about COLOR & TEXTURE  found in paintings in this area of Florida straight down and over into MIAMI and down into the KEYS - if you know MIAMI - you know MIAMI is know for and proud of its COLOR & TEXTURE.


Now I throw in the sandy beach using my palette knife with strokes that use the whole swing of the arm

WE NOW HAVE A FINISHED PAINTING DONE IN A LOOSE PAINTERLY FASHION 
EXPRESSING THE COLOR AND TEXTURE OF MY VISION OF 
"MIAMI ART"


Close ups of the bold - colorful - MIAMI induced palm fronds
 - look at this long enough and your blood will start to BOIL, you feet will start to TAP and move and get HOT - you'll want to take off your shoes and before you know it you will be up doing the MIAMI SALSA!!!

SI AMIGOS


Hope you enjoyed this little demo as much as I did when painting it.

Until next week about this same time - stay loose - embrace color - start the hips rolling and get into the MIAMI SALSA!!!!!!

JR     :>)


Saturday, March 16, 2013

BREAK IN THE CLOUDS

Yo my friends,

I've decided to do some larger pieces - using 18 x 24 heavy Linen paper with a combination of brush and palette knife.  This one I did the other day - the sky & distant hill was done using a 2 inch brush wet into wet and my loose painterly style.  The ocean and beach was done with palette knife with gusto and emotion with efficiency of strokes.  Of course the painting was done wet into wet - alla prima.

I first make a quick sketch of the horizon - the distant hill and the shore line - nothing fancy - just some lines to use as a guide.
I never stay within the lines - just not in my chemistry!!!
The photo has been darkened to show the lines 


I load plenty of paint onto a slightly wet 2" brush or as I like to say blobs & globs of paint - "use paint like you are a Millionaire!"


I quickly throw in the sky blending the blues and white across the surface.  I then using sort of a circular motion - much like you may have seen "Bob Ross" do, I continue the blending action until I get a sky/clouds look that I like - occasionally adding more blues or white as needed.
I was once told if the painting is not about
"the sky" do not make the sky too dramatic - good advice.  


Detail of sky area


I now paint in the distant hill with the 2" brush and throw in the ocean using my palette knife - ocean at the horizon darker as it is further away and the ocean gets lighter as it proceeds forward due to the sandy bottom reflecting light back up to the surface.  The shore line at an angle produces sort of a dramatic vision of a "sweeping" sandy beach.


Once again using my palette knife I toss in the sandy beach


Detail of beach


When I do the sand, I load multiple colors onto my knife in order to get variance in color and as with most palette knife work, I hold the knife blade almost flat against the painting surface so I can get variation of depth when spreading the paint.

The sand on a beach just "ain't" a nice pretty smooth surface and the palette knife loaded with blobs & globs of paint is ideal to create this uneven surface


BAM-BAM-BAM

We now have a beach and a finished painting!!!!

18 x 24
"BREAK IN THE CLOUDS"


Hope you enjoyed this demo as much as I enjoyed doing the painting

Enjoy your week my friends and remember smile at people you pass by - it will enlighten your day and their day.


JR    :>)


Sunday, March 10, 2013

ALL THAT JAZZ

Hello my friends,

A fellow artist did a painting of some apples - to be specific - Jazz apples.  I had never heard of this apple before and emailed him to see if there really was a "jazz" apple."  Sure enough they were real!! I set out and the first grocery store I stopped at - all different kinds of apples and one of the bins had a sign JAZZ APPLES!!!!

I hand picked the ones I wanted and set them up in my studio and began to throw some paint.

Now, before we begin, these jazz apples have some really nice color and some very vibrant reds with a bit of yellow thrown in.

I start out with a very quick sketch of the apples I set up off to the side of my easel.
This is not meant to be an accurate drawing but merely a sketch and I will adjust as I go along -I never stay inside the lines - that is way too much to ask of anyone!!

So I start applying reds to the apples and with the light source coming from the left, I of course make the right side of things in the shadows.

I'm doing this painting with brushes - however I load the brush up with blobs and globs of paint and use them   as if they were a palette knife - my intent is NOT to have nice pretty smooth strokes but instead strokes resulting in some texture to them.


I use a dark blue color for my shadow areas as this gives some great contrast and actually makes the bright side of the apples look brighter then the color really is.
At this time I also throw in the reflections of the apple onto the surface they sit on


I now finish up the reflections - tweak up the shadow side and throw in a color for the surface the apples are sitting on - it needs to be a color that speaks to "shiny" and therefore reflective.


I do some tweaking of the apples and their reflections


I think in this photo you can see the surface "texture" I've produce in using my brushes loaded with color and in a palette knife fashion


The next photos show slight tweaks in the overall painting 


STEMS!!!!!

I LOVE TO PAINT STEMS!!!!!

It's a challenge to paint a stem so it looks like it is coming close to straight out from the apple and out at the viewer.  Paintings are not 3D!!!!


Close up before stems


CLOSE UP AFTER STEMS


At this point the painting is finished

"ALL THAT JAZZ"
9 X 12
PAINTED ON HEAVY LINEN PAPER


Being originally from New England - living there for 55 years, there really are not a whole lot of things I like about New England - however that said - and I just said it ------- I like Macintosh apples!!

The jazz apple had a rather non-descriptive taste and it was not juicy - it was "watery"
Sooo for painting in a still life they are great --- for eating NOT SO GREAT!!

I hope you enjoyed this little demo and next week most likely it will be a palette knife demo - OR NOT - 
as I always say "Time will tell!"

Don't forget to checkout my ETSY STORE for some great values


JR    :>) 


Friday, March 1, 2013

PALETTE KNIFE DEMO

HELLO MY FRIENDS!!!!

It is good to be back with what I now feel is a blog format that works for me and works for the viewer.  As a reminder, it is not possible to comment on my blog - however you can email meat rvpainter@mail.com
to ask questions, make comments or inquire about a particular painting.

The thrust for the most part is to provide  insight as to how I paint and what processes I use.
For every painter there is a different process - so my process is mine - I've never been schooled in "HOW TO PAINT" - I am self taught with many many hours spent reading - learning - trying - reading - learning - trying - you get the picture.

I did it MY WAY - a great song and this is how I paint - MY WAY.

This is a demo on my palette knife style.  One needs to realize that palette knife painting is much more expensive then using brushes - I would guess you use 3 times the amount of paint when using a palette knife.  I love color and I love texture.

I had ( she passed away) a friend who was a professional painter and taught workshops for many - many years.  She came into my gallery in Maine - she look at my work - said very nice - however you need more color!  Her next comment has stayed with me for the past 18 years - she said;

"Use paint like you are a millionaire!"

A millionaire I'm not but if you want color and want high contrast - you need to use lots of paint whether using a brush or a palette knife.

OK I digressed long enough - if at any time I digress to long or too often - just raise your hand and interrupt me.  :>) 
  
This is a demo on a 14 x 11 sheet of heavy linen paper using Chroma Interactive acrylics which is a professional grade of paint - the only paint I use - it is thick - juicy - does not dry quickly and the array of colors is just amazing!

For those of you who are only interested in seeing the finished painting - and do not want to see the process of how the painting was created,  following is the finished painting of course - I must warn you that you will be missing some very valuable information and some of my very funny humor :>)
I will also add at this time the cost of this painting is $125 plus shipping within the USA.

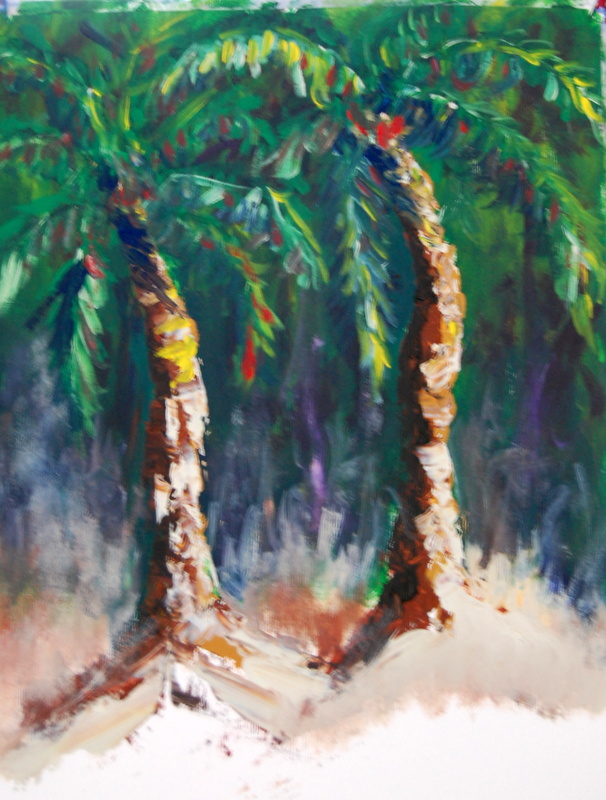
"SAND DUNES FORT PICKENS No. II"


I begin with just a few lines on the sheet - horizon - shore line - sand dune "bump"
I've darkened the photo so you can see the lines


Next I lay (throw) in the sky using 2 colors of blue as well as white.
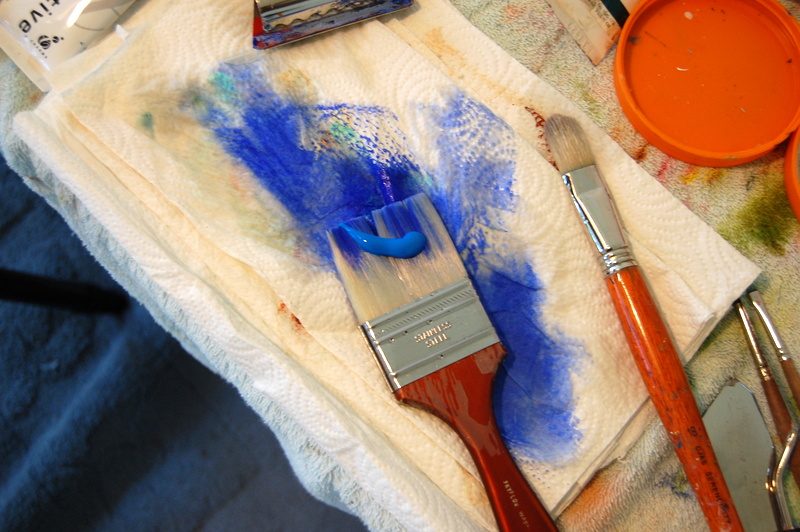
I squeeze the paint out of the tubes directly onto the palette knife - big blobs are needed a the sky covers a good size area of the painting surface.
This is applied like one would butter a piece of toast in that the flat of the blade is held almost flat against the painting surface.
The knifing process is just a matter of putting paint onto the blade - applying it to the surface - apply more paint to the blade and apply to the surface.
When doing this, you need to pay attention to what I call modelling the sky so that it is not all the same level of paint - this will give the sky dimension.  I really don't like to paint clouds, I merely put in "Indications" of what would appear to the eye to be clouds.
The eye says "CLOUDS" the brains responds and says "CLOUDS" - so everyone is happy!


I lighten up the sky at the horizon and darken up the ocean at the horizon.
This keeps the two visually separated and this is how it is in real life 


OK - a breather--------------------------------------------------------------------------------------------------------------------------------------------------------------------------------------------------------------------------------------------------------------------------------------------------------------------------------------------------------------

Now comes a part that I love - putting in that GULF COAST GREEN- this is the color that makes most people dream of going on vacation to the Gulf coast or to the Caribbean!!!
The color is sooooooo exciting it has also been know to cause people to pee in the ocean!!!

:>)


As it gets closer it gets lighter due to the light color of sand on the bottom as well as the shore line.
That's my story and I'm sticking to it!!!

Sooooo I throw in a tad of white


Some painters are PURISTS - they will not use white of black paint!!
DUH - I use what works - I never MIX white into other paints - but I will swipe my palette knife blade of brush with lightening speed over the surface.
To be honest I never MIX paint - I BLEND it on the painting surface


OK - moving right along - anyone need a bathroom break???
OK - go ahead!!!!!
---------------------------------------------------------------------------------------------------------------------------------------------------------------------------------------------------------------------------------------------------------------------------------------------------------------------

OK back to business.
The sand at Fort Pickens beach is white-white-white like a new fallen snow.  It is very fine sand and as a matter of fact it blows all over the beach road and they have to use snow plows to plow it and load it onto big earth movers to put it back onto the beach!
So - to that end we need to get some white in there!


Applied using downward strokes as that is the direction of the dune - downward with a slight slant to the left


I also apply a sand color to the beach area - I darkened this photo so you could see the contrast - I will now BLEND in some white


I squeeze out some dark green as it is time to put in some "thingies" on the dunes - grasses etc


Before the grasses and "thingies"


After the application of the green with the smaller palette knife.
Now you should notice that the green is not very dark in many places. 
This is because I'm painting wet into wet and I'm dragging the knife in an upward motion as that is how the "thingies" grow - so the wet paint gets picked up by the knife along with the green on the knife and ends up what ever color it ends up.
This brings "UNITY" to the painting in that some of the sky, ocean, dune color are now in the grass and "thingie" colors.


I let this dry for a few minutes until the grasses are slightly tacky and then with a perfectly dry brush with nice stiff bristles I "sweep" the brush in an upward direction to further give texture and height to the grasses


OK - we now have a finished painting.
I put this in a corner of a room and glance at it when I walk by - just a quick glance - I don't STARE AT IT- no one likes to be stared at!!  Besides which a quick glance will give you more of an indication of things that may need to be tweaked.  It is also good to "squint"  at it so you can see lights and darks more easily.  I don't know if this really works but all the pros say it does so I do it!!!   :>)

"SAND DUNES FORT PICKENS"
11 X 14 ON HEAVY LINEN PAPER
$125 PLUS SHIPPING


Below are photos across the surface to try and show the various thicknesses of paint that the palette knife applies - giving dimension-  texture - unity - blending of colors - a surface upon which the eyes can dance across when viewing.
If a painting is "static" and lacking color and lights and darks the viewers will walk right by it.


This photo is up side down to try and give a better view of the thickness and texture of the paint.


Palette knife painting s lots of fun and rewarding to me - more so than normal brush work and this style of very-very loose - semi-abstract is the style I like best.
Hope you enjoyed - again this is my process of painting.
If you had 10 painters give a demo on palette knife painting there would be at least 12 different methods - try it - experiment and do YOUR THANG!!!

A lady in the front row has a question - Yes---------------------------------------------

Will all my painting demos be this long?

NO WAY JOSE'

 This was the first post of my reorganized blog - giving the readers what they asked for and giving me what I wanted as well.

DON'T FORGET TO GO OVER TO MY "SISTER BLOG" and subscribe to the EMAIL SUBSCRIPTION

http://ahhpuntahhhgordahhh.blogspot.com/


JR     :>)